Setting Up MySQL on an Azure Ubuntu VM

DISCLAIMER: I know absolutely nothing about Linux or MySQL and the following is from hours of fat fingering an unforgiving PuTTY console with sweat, tears, and reckless abandon. I’m not sure how many search credits you get from Google but I probably used them all up trying to figure out how to do the simplest Linux tasks to get all of this working. If you follow these steps exactly I can’t promise anything will work nor that you won’t burn your house down in the process. Good luck
That said, the following is what I did to distance myself from ClearDB and run my own MySQL server on an Azure VM. This approach uses the new Azure Resource Manager VMs (not their “classic” VMs) and their new DSx VMs because if it’s more expensive it must be better, right? <cracks knuckles> Let’s get started…
Create Azure VM
It all starts in the Azure portal, the new one because we’re too cool for “classic”. You’ll basically want to File > New… Virtual Machine > Ubuntu Server
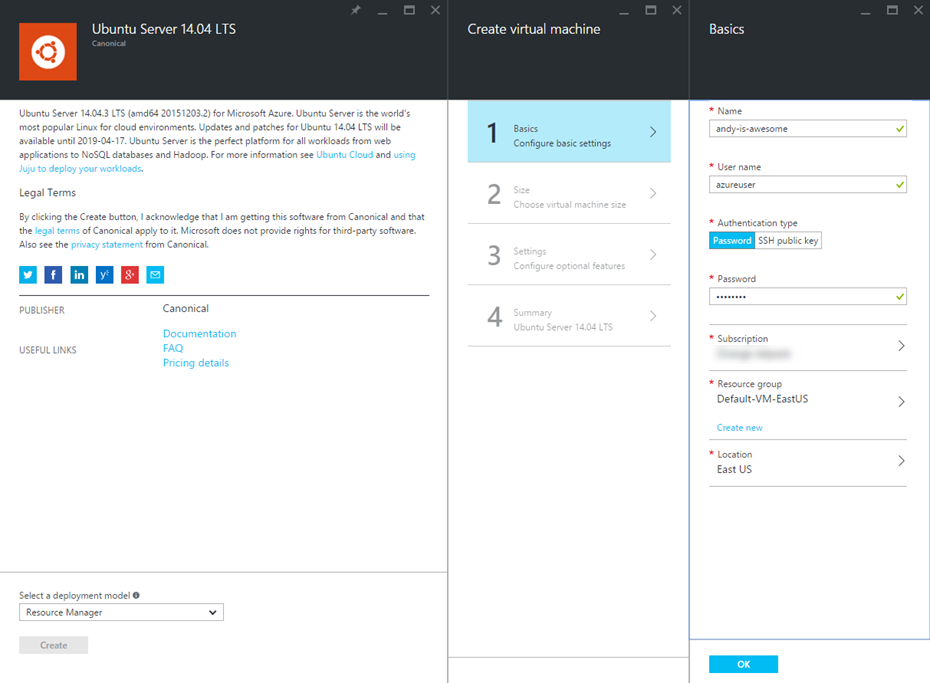
I more-or-less fill out the required fields and that’s enough information for Azure. Regarding size, I’m picking the DS2 Standard VM which is 2 core, 7GB RAM, 14GB local SSD storage for $115/month. I’m only hosting WordPress databases so while 14GB of storage isn’t much it’s more than I’ll need for a while.
Setting DNS Name
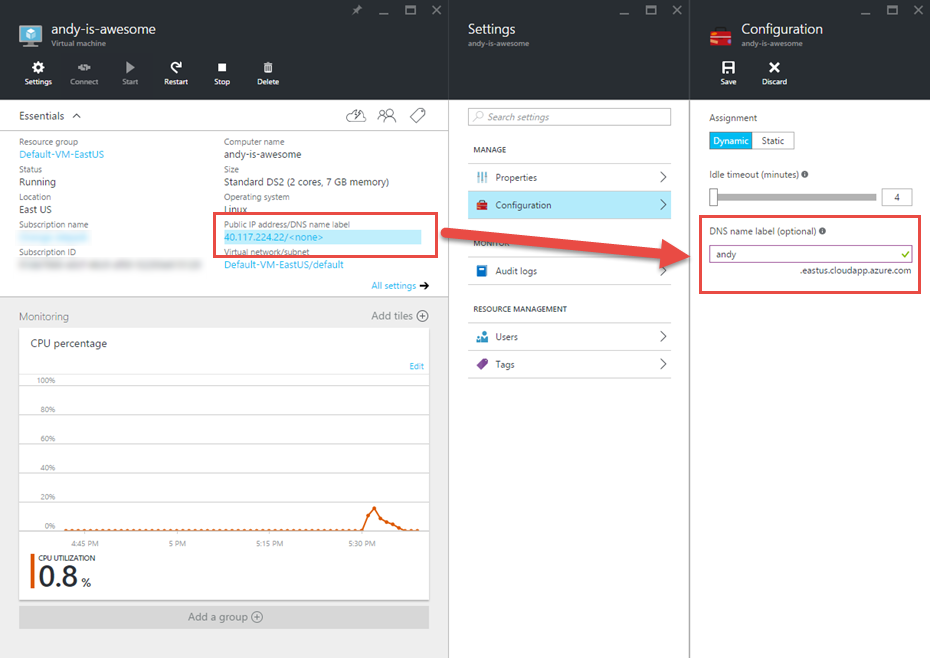
Unlike classic VMs, setting a DNS name is now an extra, optional step. No problem, just click the Public IP value > Configuration and claim your my-awesome-server.somewhere.cloudapp.azure.com DNS name:
Punching Holes in the Firewall
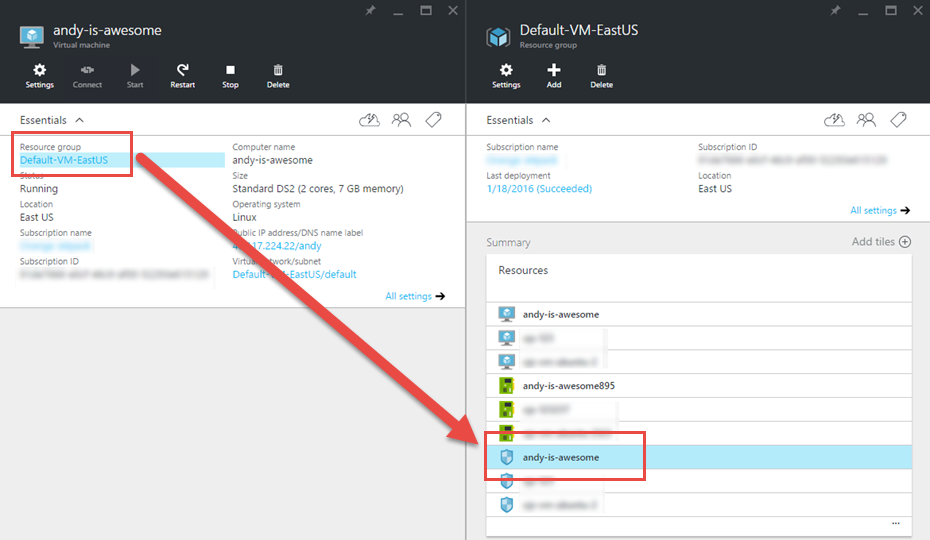
This took some hunting to find but setting endpoints and opening ports is available by finding the Network Security Group for your Resource Group.
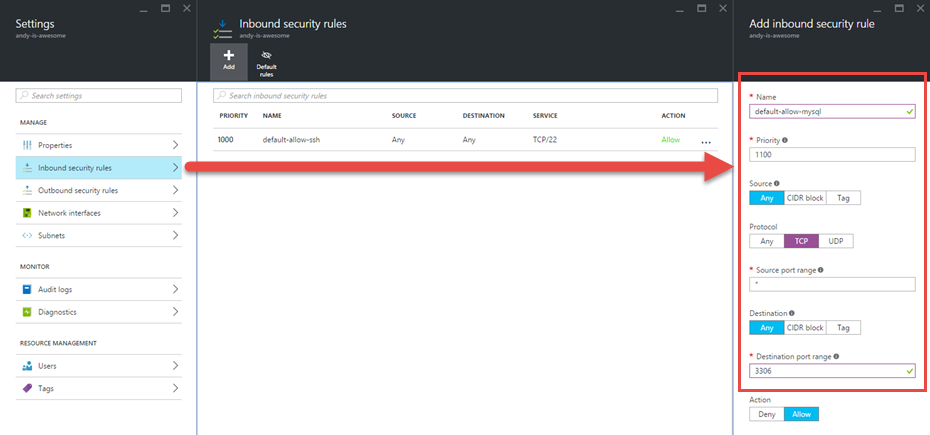
From here just add an inbound security rule for TCP to allow MySQL default port 3306. You can, and perhaps should, get fancy with nonstandard ports and SSH port fowarding in Linux but I’ll leave that step to the experts.
Connect to Your VM
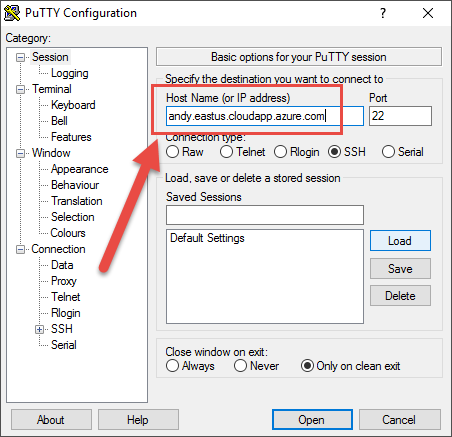
On Windows using PuTTY seems like a reasonable way to connect to your shiny new VM and all it really took was installing the client and connecting via your machine’s host name:
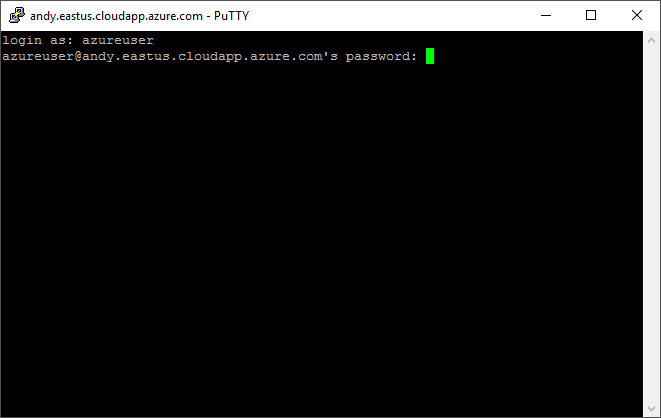
If you see something like this you are in good shape:
Install MySQL
First, switch to root user:
$ sudo su -
Install system updates and patches:
$ apt-get update
And install MySQL…
$ apt-get -y install mysql-server
You’ll need a root password:
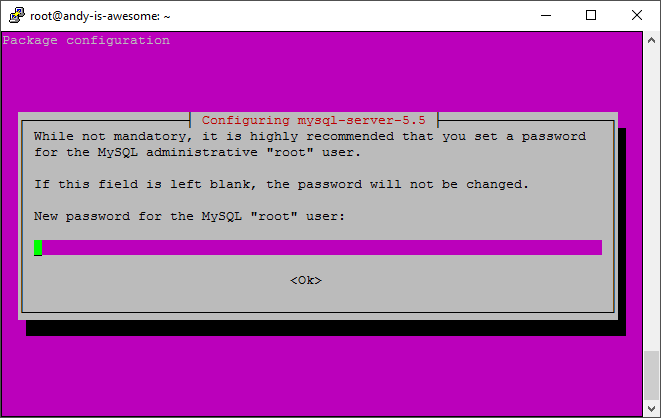
And yeah that’s it. Maybe Linux isn’t as bad as all the Windows kids are saying.
MySQL Bind Address
I spent almost all of my StackOverflow time wrestling with this one. To get MySQL to accept connections on anything other than 127.0.0.1 you need to update its config. You can use nano (Notepad with less features?):
$ nano /etc/mysql/my.cnf
Then update bind-address to either 0.0.0.0 (probably less secure) or the actual IP of the machine. I don’t know what I’m doing so I chose the former:
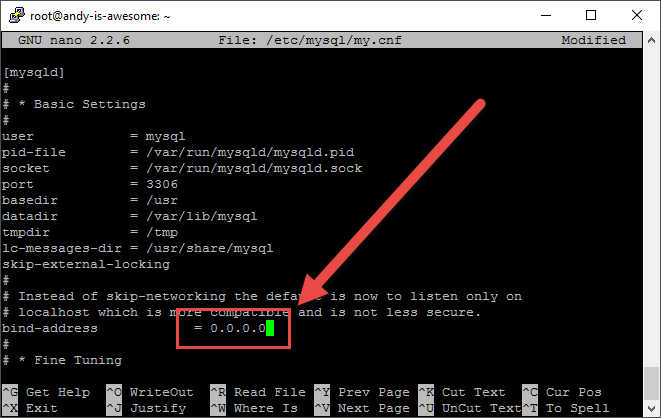
When you’re done you’ll want to restart the MySQL service:
$ service mysql restart
Testing Port 3306
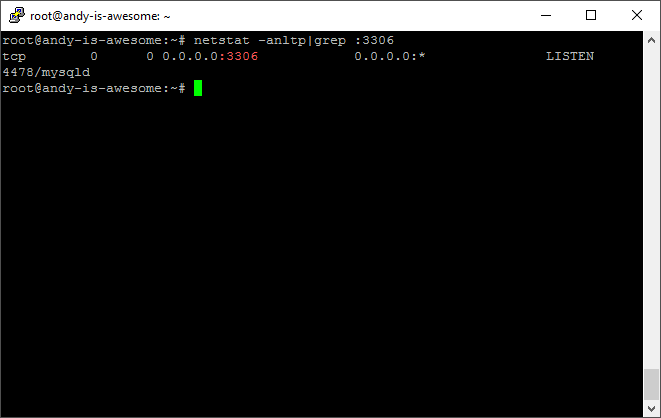
At some point you might want to test that port 3306 is open on the VM and in Azure. On the VM:
$ netstat -anltp|grep :3306
You should see something like:
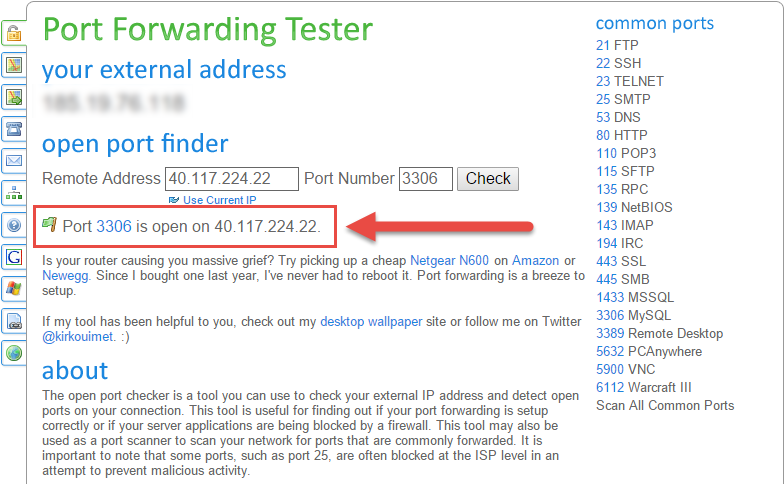
You can then test port 3306 online using a tool like Port Forwarding Tester:
Create Database and User with Remote Access
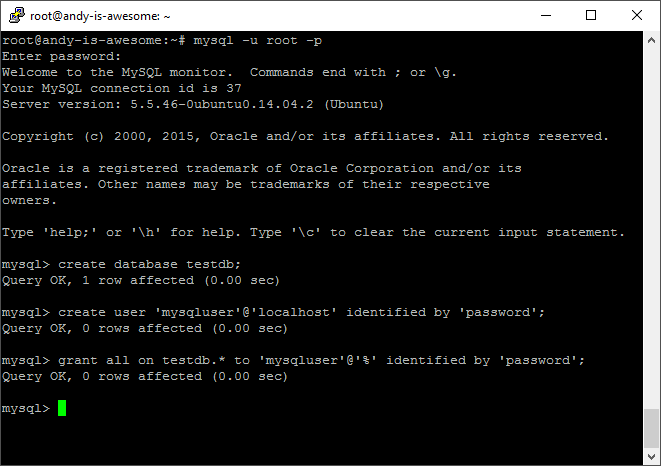
First we’ll sign into MySQL with the root user account:
$ mysql -u root -p
Then we’ll create a database, create a user, and grant remote access to that user:
mysql> create database testdb;
mysql> create user 'mysqluser'@'localhost' identified by 'password';
mysql> grant all on testdb.* to 'mysqluser'@'%' identified by 'password';
Test Database Connection
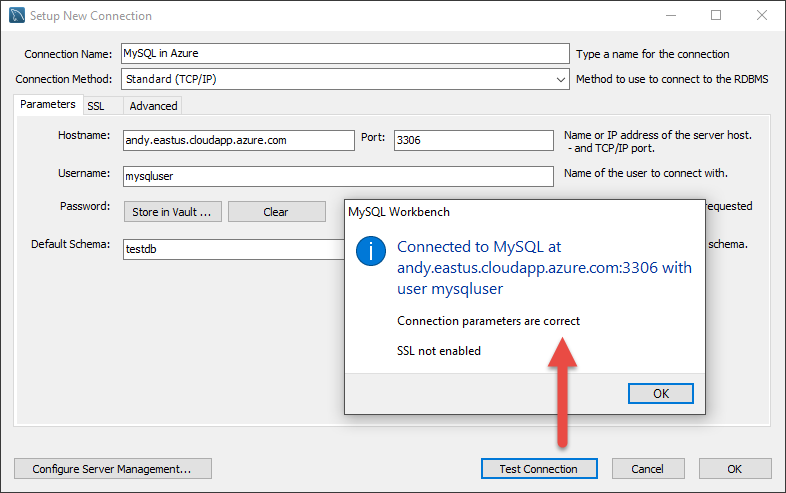
Finally, let’s test that we can connect to our database using our new remote user account, I’m using MySQL Workbench to set up a new connection to test:
DONE
So really that’s it, not too bad even with the zero Linux and MySQL experience that I had. Hope that helps and if you have any questions or advice just let me know…
References
I did have a lot of help, here are my favorite posts that got me started and ultimately allowed me to figure this out:
