
An Introduction to Hgflow
Having bounced between a number of version control solutions the last five years I’m finally very comfortable enjoying the sole embrace of Mercurial (Hg). It’s easy to be a fan of distributed version control and not only does Hg work very well within my workflow but fits nicely with my tech stack (FogBugz + Kiln by day and Bitbucket + AppHarbor by night). Very recently I was introduced to hgflow having played with it for a few days across several projects I’ve become a big fan.
Introduction
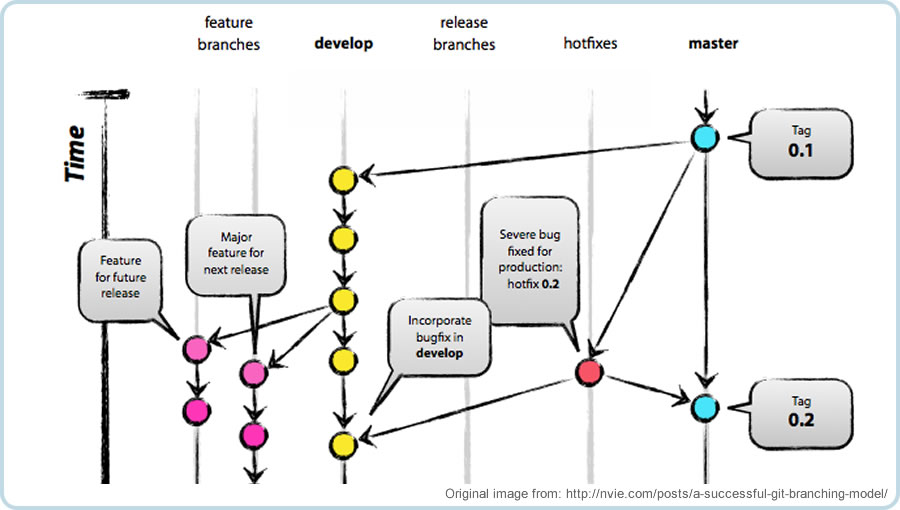
Hgflow is an open-source extension for Hg inspired by git-flow (Why aren’t you using git-flow?) and built around Vincent Driessen’s popular Git branching model. In essence it formalizes the workflow around Driessen’s model and provides commands for branching and merging features, releases, and hotfixes within that model. For me it provided a very comfortable model to work within and a nice set of commands to provide the perfect amount of control and automation.
Download and Install
The project is hosted on Bitbucket (https://bitbucket.org/yinwm/hgflow/overview), you can download the latest [currently] hgflow-v0.4.py from the downloads page (only 17KB!). I saved it directly to C:\Program Files (x86)\Kiln Client\hgflow-v0.4.py. Hgflow itself appears to have branched a few times and updated version appear to be available by others but yinwm’s appears to be the original and most followed.
The extension is a single Python file, to add it into Hg just update your hg ini file, mine is at: C:\Users\%USERNAME%\Mercurial.ini:

Walkthrough
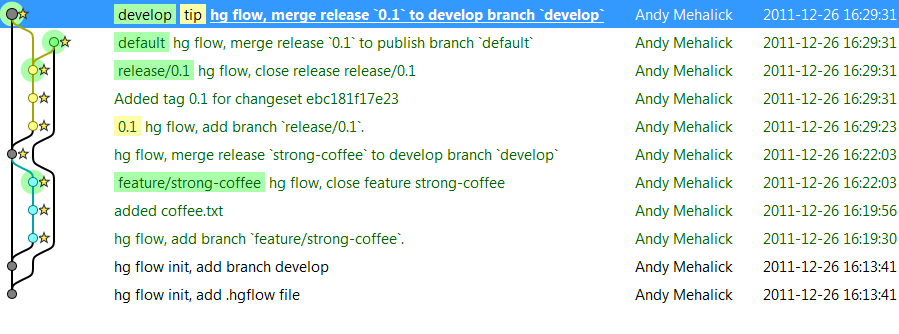
For the following walkthrough I’m going to create a simple repository and demonstrate creating our first feature and release branch. I’ll be interacting with hgflow exclusively from the command line but I’ll show you screenshots from TortoiseHg as I go so you can visualize what is happening with the repository.
Let’s start by creating a directory and initializing a repository and hgflow; I’ll go with the default branch name options which feel right to me:
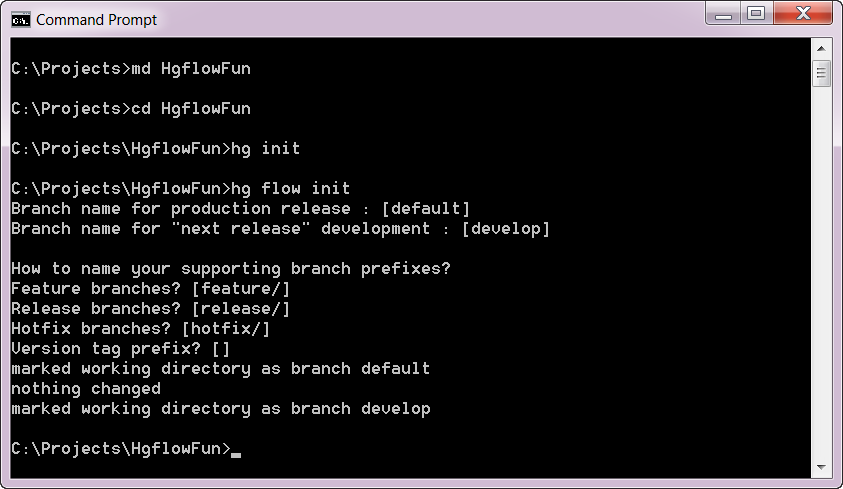
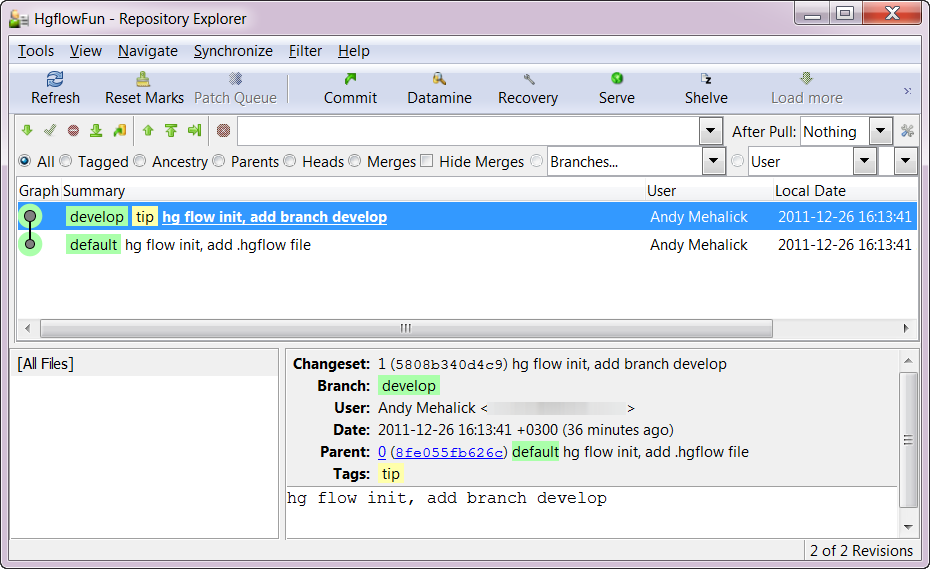
This creates for us a default and develop branch and commits:
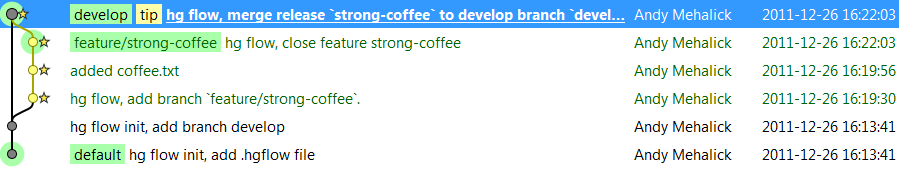
So now let’s say I’m tasked with creating a new feature we’re calling Strong Coffee, I’ll tell hgflow that I want to create a feature branch and the feature command branches for us and sets it as our working copy:
hg flow feature start strong-coffee
I’ll now add a simple file (coffee.txt) and commit:

Now that my feature is complete I will tell hgflow I am finished; this is where automation steps it up a notch by committing, merging with develop branch, and setting it as my working copy:
hg flow feature finish strong-coffee
Now let’s say we fully integration test develop with our new Strong Coffee feature and are ready to push out the next release (version 0.1) of our project, we:
hg flow release start 0.1
This is where we probably deploy to staging and acceptance test, when approved we finish the release:
hg flow release finish 0.1
This moves our release to the default branch (a.k.a. production) and merges back into develop (not usually necessary but helpful in some situations).
As an aside, if you are using Bitbucket to host your source code (FREE) and AppHarbor to host the application (FREE) this step automatically runs your unit tests and if passing deploys the latest version for you (AUTOMATIC + FREE = CRAZY DELICIOUS). Seriously, if you have personal projects I strongly recommend Bitbucket + AppHarbor.
Conclusion
Hgflow shouldn’t introduce any radical change to the standard source control workflow, it simply introduces a more formal vocabulary for describing branches and applies a nice model to the process. On top of that it adds a nice bit of automation and makes working with Hg even more enjoyable.